Voxel Winter Survival Getting Started Guide
Build a shell, start the snowstorm, survive for coins, buy better blocks, expand.
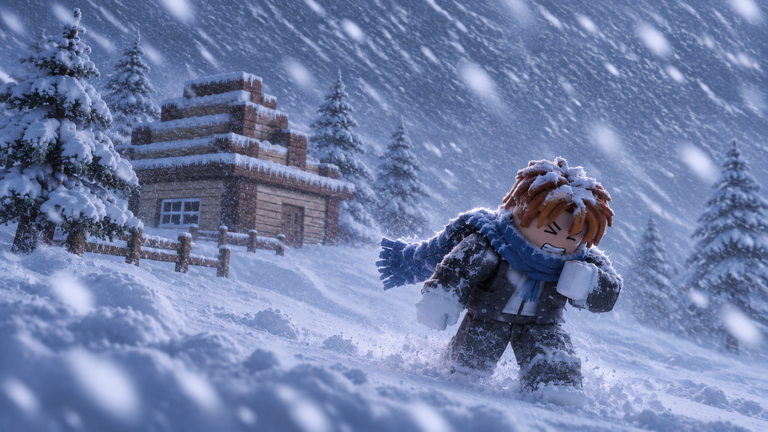
Voxel Winter Survival is a Roblox survival game from the WinterSurvival! group where your progress is measured in minutes endured, not flashy decoration. The official loop is simple and ruthless: build a base with blocks, start the snowstorm, survive as long as you can, earn coins from that survival time, buy new blocks, expand the base, and push longer runs. Servers hold up to five players, so solo and small-party play both work. This guide gets you through the first session without wasting your earliest coins.
If you need inputs first, skim Controls. For layout detail after this overview, open Base Building. Storm tactics live in Survive the Snowstorm, and spending plans in Coins and Shop.
What you are trying to do
Every successful session follows the same arc:
- Secure a closed space — walls and a roof so the storm has somewhere it cannot freely chew you.
- Start the snowstorm when ready — not the moment you join, and not after a half-finished maze.
- Survive — stay inside cover, patch failures, avoid unnecessary trips outside while pressure is high.
- Collect coins — payout scales with how long you last.
- Shop for better blocks — reinvest into materials that let the next shell hold longer.
- Expand — add rooms, thicken walls, improve access, then run again.
Treat coins as survival time banked in your wallet. A short, clean run that funds a meaningful upgrade beats a chaotic wipe that teaches nothing.
First minutes after joining
Spawn in, orient yourself, and find where building and shopping happen in the current UI. Do not start the snowstorm on impulse. Your first goal is a minimum viable shell: four walls, a doorway you control, and a roof. Keep the footprint small — a closet you can defend is better than a palace with holes.
While you place starter blocks:
- Close every gap at head and foot height.
- Prefer a single entrance so you always know where pressure comes from.
- Leave a little open ground nearby for later expansion instead of building flush against unusable edges.
- If friends are in the five-player server, assign one person to place walls and one to watch for missing corners before anyone hits start.
When the shell is closed, do a walk-around. Look up at the roof line and down at the floor seam. Most early failures are one missing block, not a bad strategy.
Starting your first snowstorm
Start the storm only when:
- You can stand fully inside without seeing sky through the roof.
- The door or entrance can be sealed or watched.
- Someone (you, solo) is ready to patch instead of sightseeing.
During the storm, prioritize staying enclosed. Survival time is the currency printer. Dying early for a scenic screenshot costs the upgrade that would have made the next run trivial. If the structure starts failing, patch the hole in front of you before decorating or expanding mid-blizzard.
After the run ends, note how long you lasted and what broke first. That note drives your next shop purchase — see Coins and Shop for how to spend without stalling.
Early coin priorities
Spend your first payouts on blocks that extend survival, not cosmetics. Order of value for new players usually looks like:
- Blocks that let you thicken or double-layer critical walls.
- Blocks that finish a proper roof or seal awkward angles.
- Blocks that let you add a second room or airlock-style entrance.
- Convenience pieces only after the shell can hold a clearly longer storm.
Avoid emptying the wallet on a huge footprint you cannot finish before the next start. Unfinished wings become cold leaks. A compact upgrade path keeps every coin converting into minutes.
Check the Codes Hub if promo rewards are live — free coins or gifts can accelerate the first upgrade cycle — then return to deliberate shopping.
Co-op on small servers
With a max of five players, communication matters more than crowd tactics:
- Builder — places and expands the shell between storms.
- Patcher — watches weak walls during the storm and fills gaps immediately.
- Runner — only leaves cover for essential shop or block tasks when it is safe.
- Caller — tracks time survived and calls when to stop expanding and seal.
Solo players simply rotate those roles mentally: build, seal, start, patch, cash out, shop, expand.
Common day-one mistakes
- Starting the storm with an open roof — minutes vanish instantly.
- Building wide before building sealed — large bases with gaps pay less than small sealed boxes.
- Spending all coins on looks — style after survival length is stable.
- Ignoring the failure point — if the same wall dies every run, upgrade that wall, not a new wing.
- No plan between storms — the calm period is for shopping and sealing, not AFK.
What to read next
- Controls — stop fumbling placements mid-storm.
- Base Building — starter layouts and expand patterns.
- Survive the Snowstorm — stretch every run for more coins.
- Coins and Shop — progression buys that compound.
- Tier List Hub — community rankings as the meta settles.
- Updates Hub — patch changes that affect storm or shop balance.
- Scripts and Players — extra tools and creator context when you want them.
Master the loop once and every later guide becomes an optimization layer on top. Build, start, survive, earn, buy, expand — then do it cleaner than last time.
Frequently Asked Questions
Quick answers for Voxel Winter Survival players.
When should I start my first snowstorm?
Only after you have a fully enclosed shell with walls and a roof. Starting early with open sky almost always wastes the run and delays your first meaningful shop upgrade.
How do I earn coins in Voxel Winter Survival?
Coins scale with how long you survive after the snowstorm starts. Longer enclosed runs pay more; spend those coins on better blocks to expand and harden the next base.
Is the game solo-friendly?
Yes. You can play alone or with up to four others (five players max). Solo play uses the same loop; co-op mainly helps with faster building and patching.
What should I buy first in the shop?
Blocks that seal gaps, thicken failing walls, or finish a roof. Delay cosmetic purchases until your survival times are clearly climbing.
Where do I find codes and patch notes?
Use the Codes Hub for redeemable rewards and the Updates Hub for patch notes. This Getting Started page focuses on the first-session loop.